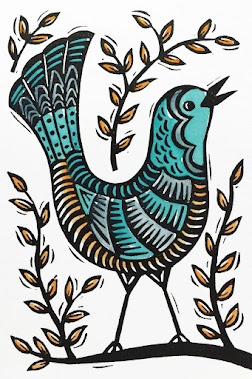
I'm getting ready to start a new smallish print and I realized that I haven't shown how I make a linoleum block before. It's really easy if you have the right tools. I almost always use masonite for the block because it's strong, thin, and doesn't warp (very much). That's the brown hardboard stuff that has a waffle pattern on the back. I cut it to size with a circular saw. Then I usually sand the masontie quickly with rough sandpaper. That roughens up the surface and makes it more likely that the glue will grip it well.
I buy the Battleship Gray linoleum in large sheets or a roll. You can get it lots of different places- Dick Blick, McClain's Printmaking Supplies, and Graphic Chemical & Ink are places where I've bought it before. You can also buy linoleum already mounted on a block. I like it unmounted so I can cut it into any shape I want. And there are different kinds of linoleum that are made in different colors- they vary in softness and other qualities. I like the battleship Gray because it holds fine details well.
Then I cut the linoleum with an X-Acto knife and a ruler. It's tough stuff so you have to score it many times before it will cut all the way through. I like to use clear grid rulers that I learned about from my mom who is a quilter. And to protect your table, you can do the cutting on a self-healing mat. The ruler and the mat are so handy for cutting just about anything- I can't imagine life without them!
When I have the masonite block and the linoleum ready, I put a lot of wood glue on the back of the linoleum.
Then I smear the glue around with my finger. It's really difficult and frustrating when you are carving and the linoleum isn't glued down everywhere so it's best to be thorough. Then I put the two pieces together and leave the block under heavy weight overnight or for 6 hours or so. Ta da!
Here's the drawing for my next print. My illustration group Between the End Pages picks a theme to illustrate for each month and I haven't been able to do the last couple months. So I'm trying to get a jump on the theme for April- Rainstorm. I'm looking forward to doing a small straightforward print that I can start and finish in a reasonable amount of time!
Subscribe to:
Post Comments (Atom)


I love seeing your process! And I especially love your April illustration! Just wonderful.
ReplyDeleteThank you Marsha! I think I'd better redraw that awkward bird one more time. :)
ReplyDeleteSo much cutting-i'd need a regular supply of bandaids-I poke myself so much with a needle!
ReplyDeleteThis is a nice how-to for those who want to move past the size limitations of commercially mounted lino.
ReplyDeleteA great money-saving idea for art teachers or craft counselors at summer camps, too!
I do love, love, love how you show us what you're doing and how you do it!
Thank you Julia and Katy! Have you done any printmaking Katy? There are so many little steps, but it all pays off when you lift the paper up for the first time and see what your new print looks like. :)
ReplyDelete